Our fabulous hydrangea season continues. But now it’s time to think about hydrangea pruning in mid-season, specifically big leaf and mountain hydrangeas. We have had so much good weather that the plants are putting on lots of new growth. That’s good news and bad news. Good news in that the new growth will fuel your flowers for 2022. Not so good news as that new growth is beginning to obscure this year’s flowers.
WHERE ARE YOUR FLOWERS COMING FROM
Consider giving your plants a mid-season haircut. But where? And how? First, look to see where your flowers are coming from. Are they blooming from buds along the stems or from the tips? If they are coming from the side shoots, they are rebloomers.
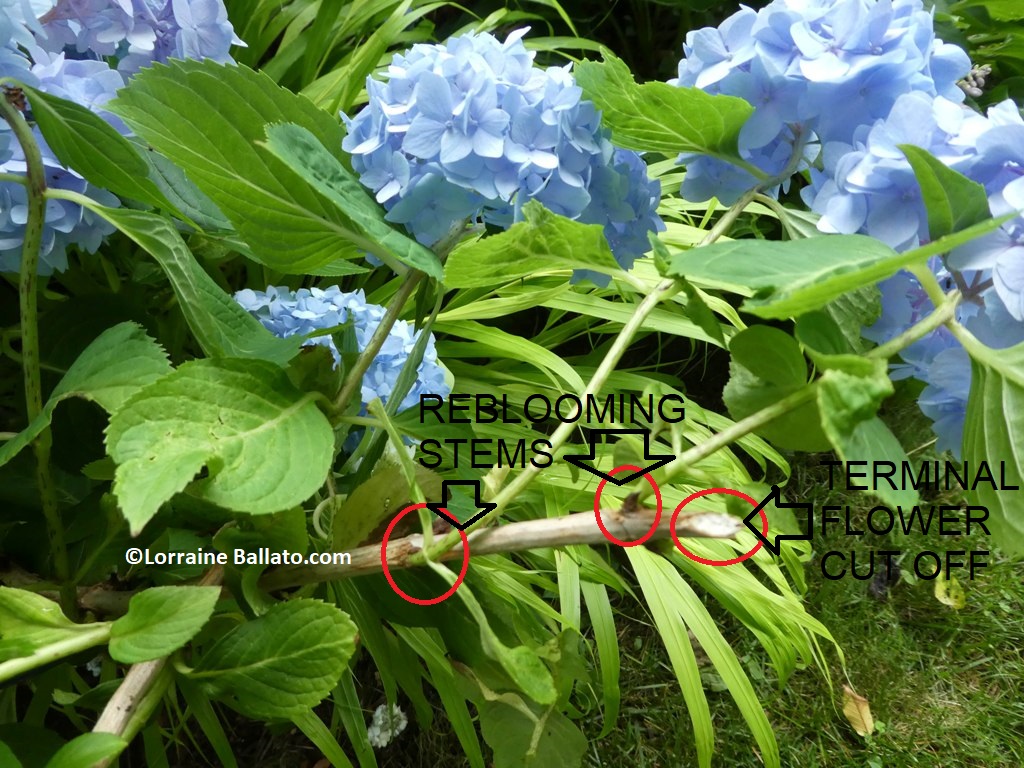
Reblooming hydrangea stem shows where flowers emerge
That’s wood that might have been grown last year and made it through the winter. It could also be from wood that was produced this year when you cut off the tip. Maybe that tip got frozen off or the flower has gone by. On rebloomers, the more you cut the tips, the more flowers you will get along the stem for later season color. But once that stem has fully flowered, it won’t give you any more flowers, ever. So if you cut those flowers for a bouquet, you can cut that stem down to the ground and stimulate the plant to grow a new stem for future flowers. That’s one type of mid-season pruning. You can also just leave things alone and remove the stem next year to stimulate the plant.
IMPROVE YOUR PLANTS’ LOOK
Does your plant look like this? Notice that the new growth from this season is obscuring the flowers.
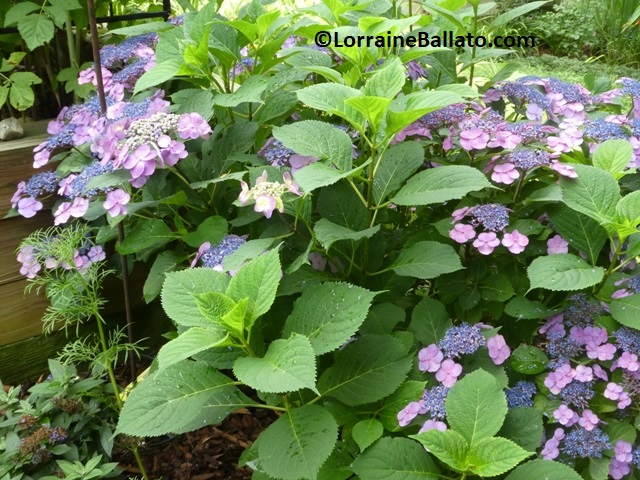
Hydrangea flowers on mid-season plant are hidden by new growth
If you want to reveal those flowers, now is the time to do some mid-season hydrangea pruning and cut those stems back. A reminder: anytime you cut your plant you will stimulate it, so do this cutting by about August 1. You might even want to take those cuttings and root them for more plants (more on that later). This is what my plant looked like before removing some (not all!) new growth.
In addition to improving the look of your plant, this mid-season hydrangea pruning will help it make more flowers for next year. You simply remove the growing tip (“pinch”) just above where you see two leaf nodes.
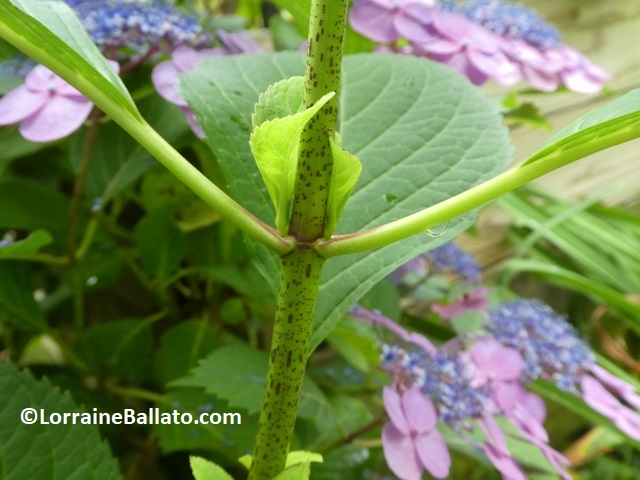
Cut hydrangea stems just above where you see emerging growth
This forces the plant’s growth hormones into those two nodes which will become stems that can produce flowers going forward.
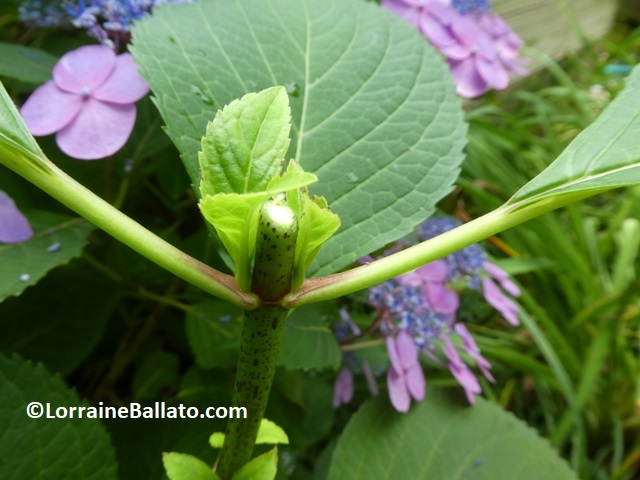
Hydrangea stem cut just above leaf nodes to create two new flowers for next season
The below photo shows the result of a previously “pinched” stem. I got two flowers instead of just one, the desired result.
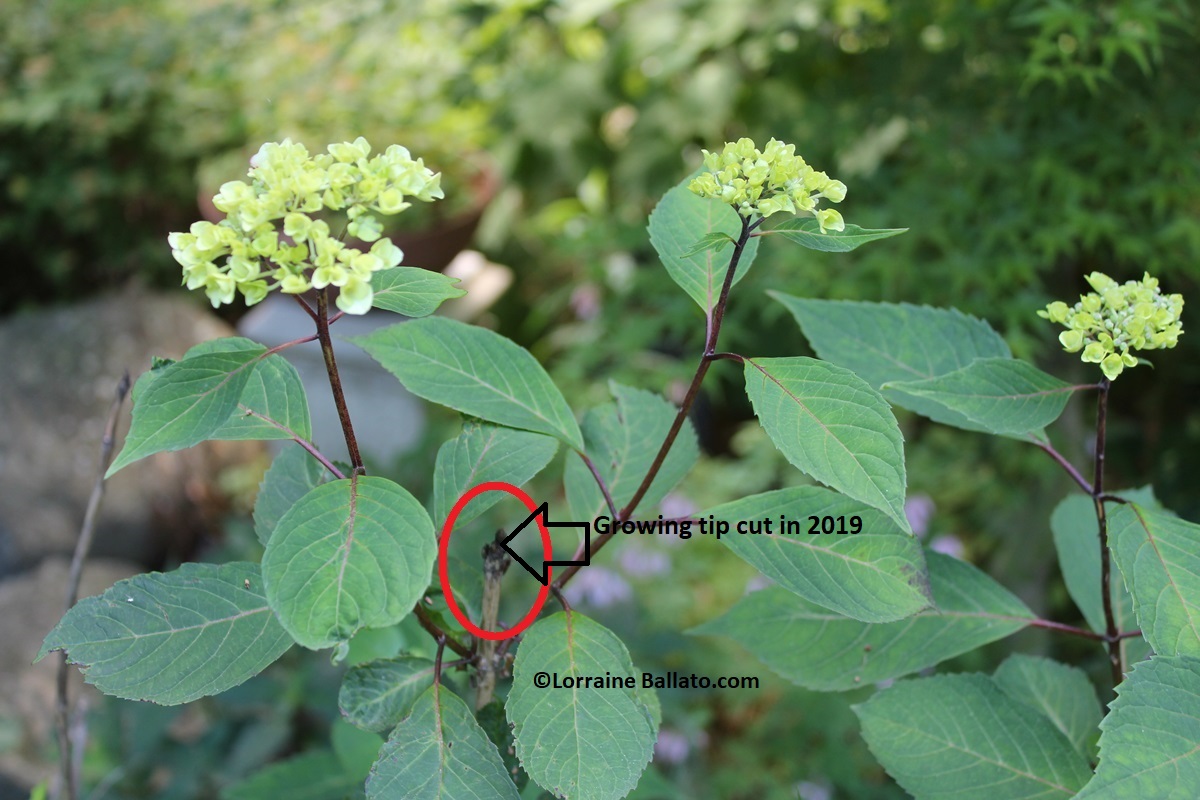
Hydrangea flowers on stem that was pinched
ROOTING YOUR CUTTING
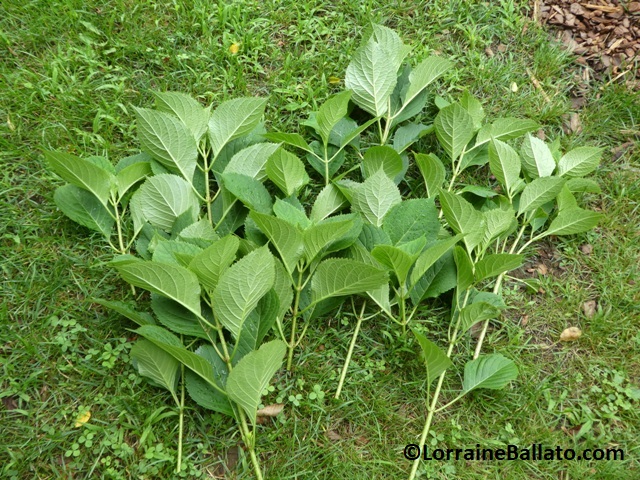
Hydrangea cuttings from mid-season pruning
But now you have all these cuttings which seems so wasteful to compost. Why not take a few and root them for more plants? It’s super easy. Here’s how:
- Gather your materials first: sharp scissors, rooting hormone, water, potting soil, small nursery pot;
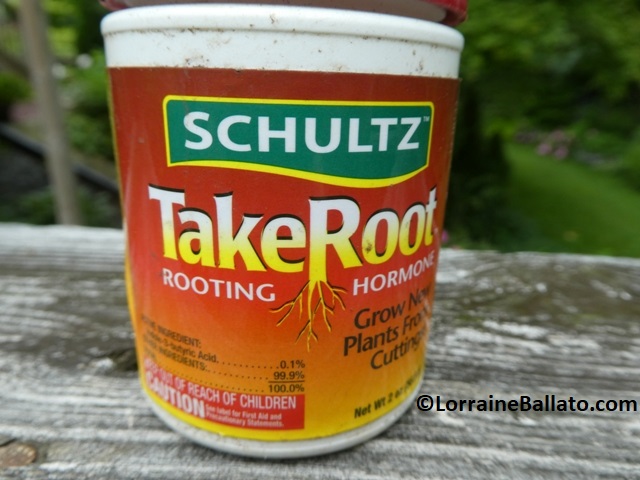
One commercially available rooting hormone
- Prepare the nursery pot before you start cutting. Fill it 3/4 of the way with moistened potting soil and make a central hole;
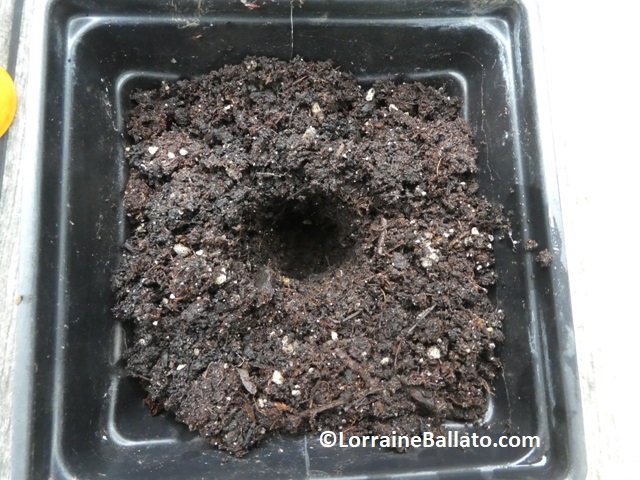
Nursery pot ready for rooting a cutting
- Take the stem you have already cut from your plant and give it a second cut just below the nodes where the leaves emerge. Nodes are where the plant’s growth hormones are stored. You want to use those hormones to make roots;
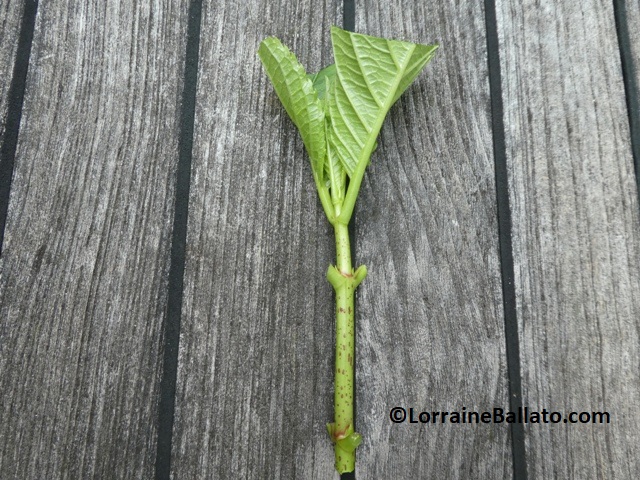
Cutting prepared for dip into rooting hormone
- Use your scissors or snips to cut off all but the top two leaves and the ends of those leaves;
- Dip the stem including the nodes in water, then in the rooting hormone. Be sure to fully coat the nodes in the rooting hormone. Tap the stem to release any excess rooting hormone back into the jar;
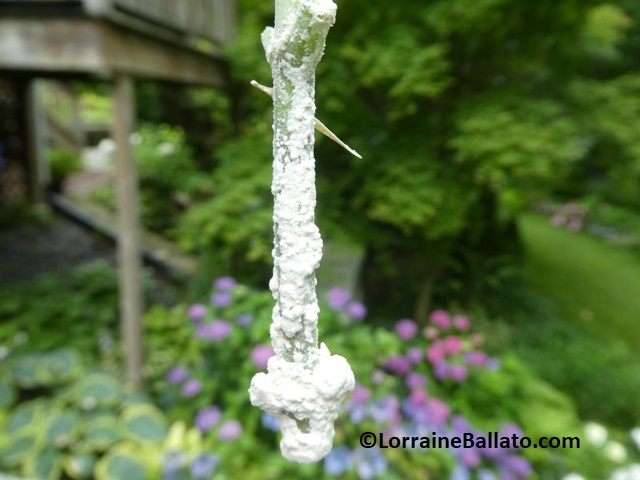
Hydrangea cutting coated with rooting hormone
- Gently place that hormone coated stem into the central hole you made in the nursery pot and firmly press the surrounding soil around the stem. You want to cover the nodes without dislodging any rooting hormone;
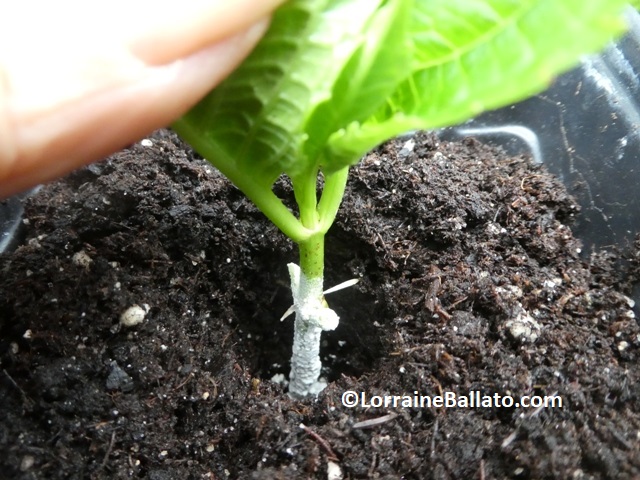
Gentle placement of hydrangea cutting into nursery pot
- Gently water your new “baby.” If you have a “mist” setting on your hose end, use that. You don’t want to dislodge or oversaturate the cutting. All future watering of the cutting should be from the bottom. If you can mist from the top, try to do it lightly maybe twice a day. The key point here is not to let your cutting dry out. That would be certain death and failure. Keep your cutting out of the direct sun until the roots develop in a few weeks .
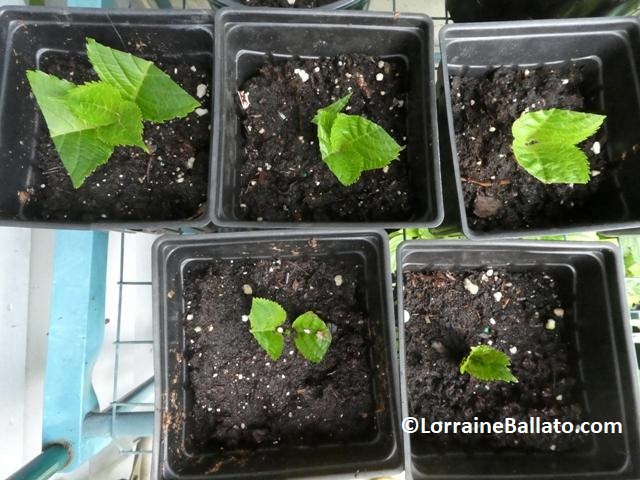
Hydrangea cuttings rooting in pots
WHAT TO DO WITH A ROOTED CUTTING
You can tell that your cutting has rooted when it resists a slight tug. At that point, repot it into a larger container and keep it moist. You can acclimate it gradually to some sun and should plan to transplant it carefully into the ground 6 weeks before your first frost date at the latest. That will give it time to develop more roots and get set for its life outdoors. Alternatively, you can always try to keep it alive inside the house, a greenhouse (you lucky dog!), or unheated attached garage for the winter and set it out next spring. It’s a good idea to root more than one cutting: not all of them make it. When you plant it out don’t fertilize it. That would direct the plant to push new growth vs. making roots, your primary initial objective.
MORE INFO ON PROPAGATION
This technique can work for most all plants you want to propagate. I have an entire chapter on propagation in my book, Success With Hydrangeas, A Gardener’s Guide. You can order it HERE.

Gardener holding book, Success With Hydrangeas
OTHER ITEMS OF NOTE

Audience listening to speaker
On August 14 and August 28 I will be delivering 2 Zoom classes for the New York Botanical Garden (www.nybg.org). Go HERE for the info on the classes.
6 Secrets for Stunning Hydrangea Flowers
Get my FREE mini-guide with 6 fool-proof tips showing how to grow hydrangeas that produce the most amazing flowers.
No spam - I promise!


